The short answer
Sign and number a print in soft pencil in the margin just below the image:
- Left: the edition number, written as a fraction: 7/25 is print 7 of 25.
- Center: the title, if you use one.
- Right: your signature, usually followed by the year.
Never change the edition size once you have sold a print, never use a number twice, and give every print its own matching certificate.
The standard layout: number, title, signature
This layout is a convention, not a rule, but it is the one collectors and galleries expect, so it is the safe choice. It works the same for etchings, linocuts, screenprints and digital prints.
- Edition number at the left, under the image.
- Title in the middle, if you use one.
- Signature and year at the right.
- Use pencil. A soft graphite pencil (HB to 2B) does not fade, bleed or smear, and it shows it was written by hand, not printed.
- Leave room. Write about 1 cm (⅜ in) below the image, light enough that you do not dent the paper.
- Sign the way you always sign, so the print and its certificate can be compared.
- Write the title in quotation marks or leave it off; many artists use it only on the certificate.
What 7/25 means
7/25 means this is print 7 in an edition of 25. The second number is the total that will ever exist in that edition, at that size, from that matrix (the plate, block, screen or file). The first number says which one you are holding.
Numbered edition 25 prints, each marked n/25
Proofs outside the edition, 3 artist proofs
Numbers do not have to follow the order you printed in, and for most modern prints a lower number is not better. What matters is that each number is used once and the total is honest.
Choosing an edition size
There is no correct size. Think about:
- The technique. Some blocks and plates wear or are destroyed as you print. A reduction linocut is cut away color by color, so the edition is whatever survives the last color.
- Demand. Pick a number you can realistically sell. An edition that never sells out is not a problem, but it tells buyers something.
- Cost and format. Large prints on cotton paper cost more to make and frame; small editions of large work are common.
- Every size you plan. If you will print the same image at two sizes, decide now whether they are separate editions or share one total, and say so on the certificates.
Hand-printed editions are often 10 to 50; digital editions run from a handful to a few hundred. Once the first print is sold, the total is fixed. Printing more later, or starting a “new” edition of the same image at the same size, breaks the promise the number made.
Proofs: AP, PP and HC
Proofs are prints from the same run that sit outside the numbered edition. They are marked in place of the number, and they do not count toward the total.
AP, artist proof (or E.A., épreuve d’artiste): prints the artist keeps or sells separately, often numbered among themselves, such as AP 2/3. A common convention is about one artist proof for every ten prints. artist proofs explained goes further.
PP, printer’s proof: a print kept by the printer or print studio that made the edition, as a record and a thank-you.
HC, hors commerce (“not for trade”): prints made for exhibition, reference or a publisher’s archive rather than sale.
Open editions
An open edition has no fixed total, so its prints are not numbered. You can still sign them; many artists sign open editions and leave the left side blank, or write “open edition”. On the certificate, choose Open edition rather than a number, so nobody mistakes it for a limited edition.
Signing on the back, and photographic prints
Sign on the back when the image runs to the edge of the paper, or when a mark on the front would spoil it. Use the same layout (number, title, signature and year) in the lower part of the back, away from the image area, and press lightly.
Photographic prints follow the same idea. Matte fiber and baryta papers take a soft pencil in the margin. Glossy and resin-coated papers reject pencil: use an archival pigment pen, let it dry, and test it on an offcut of the same paper first. Never use a ballpoint, which can dent through to the image. For the certificate, see certificates for photographic prints.
Matching certificates to prints
Give every print its own certificate, with the same number written on both. The certificate also gets its own reference, so print 7/25
of “Harbor Light, No. 3” carries certificate COA-2026-0418. Keep a list of numbers, certificate references and buyers as you
sell, and you will never issue a number twice. Our certificate maker keeps the edition number and the certificate number in
separate fields, so the two never get mixed up. Our page on making a
certificate for each print in the edition covers the whole run.
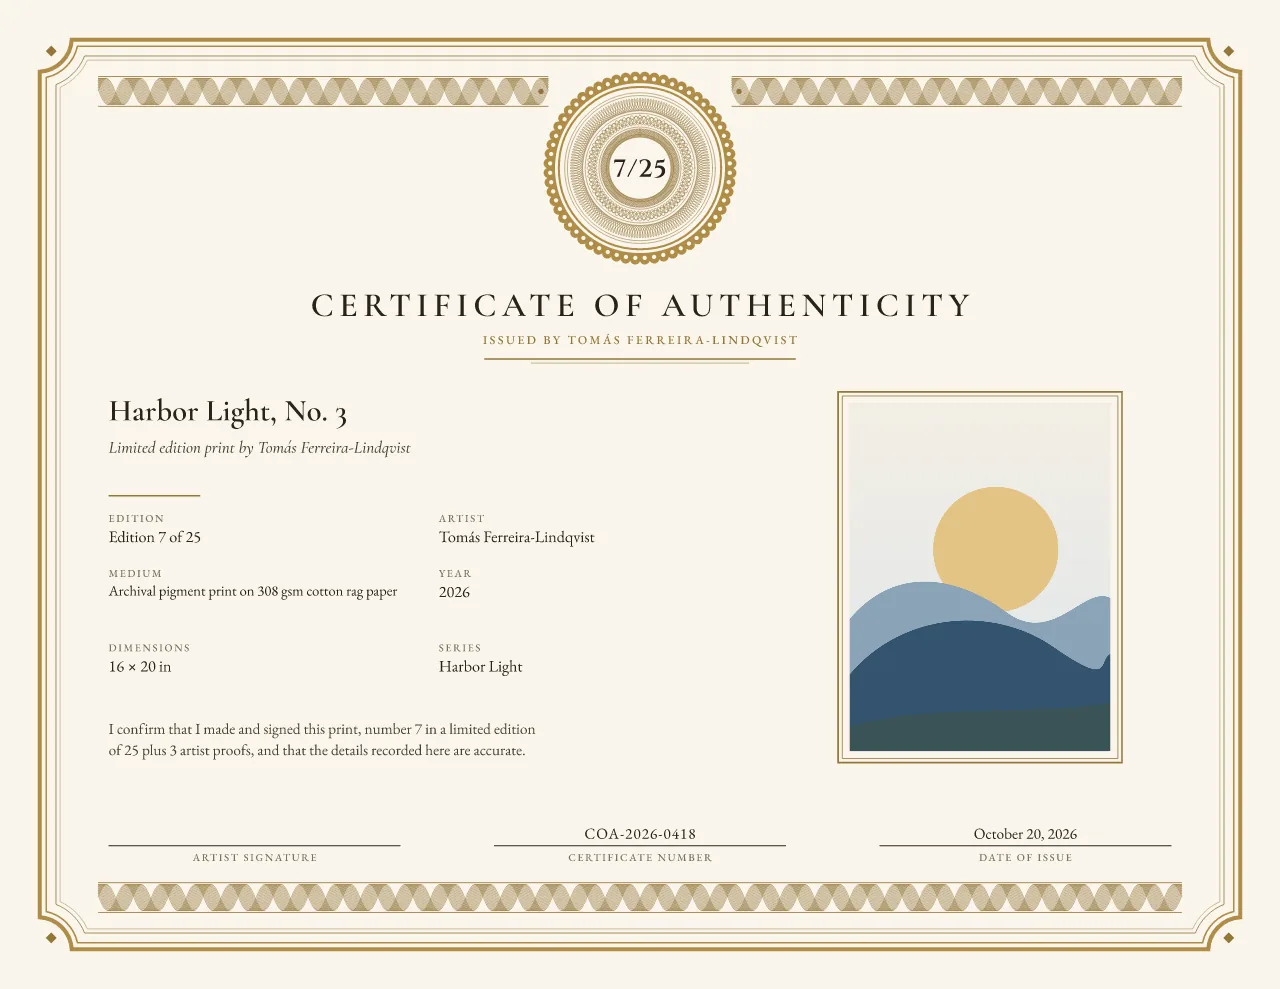
Edition Rosette design
Limited edition print, 7/25
The edition fraction sits in the rosette; the certificate number is separate.
- Issued by
- Tomás Ferreira-Lindqvist
- Work
- Harbor Light, No. 3
- Medium
- Archival pigment print on 308 gsm cotton rag paper
- Size
- 16 × 20 in
- Edition
- Edition 7 of 25
- Certificate no.
- COA-2026-0418
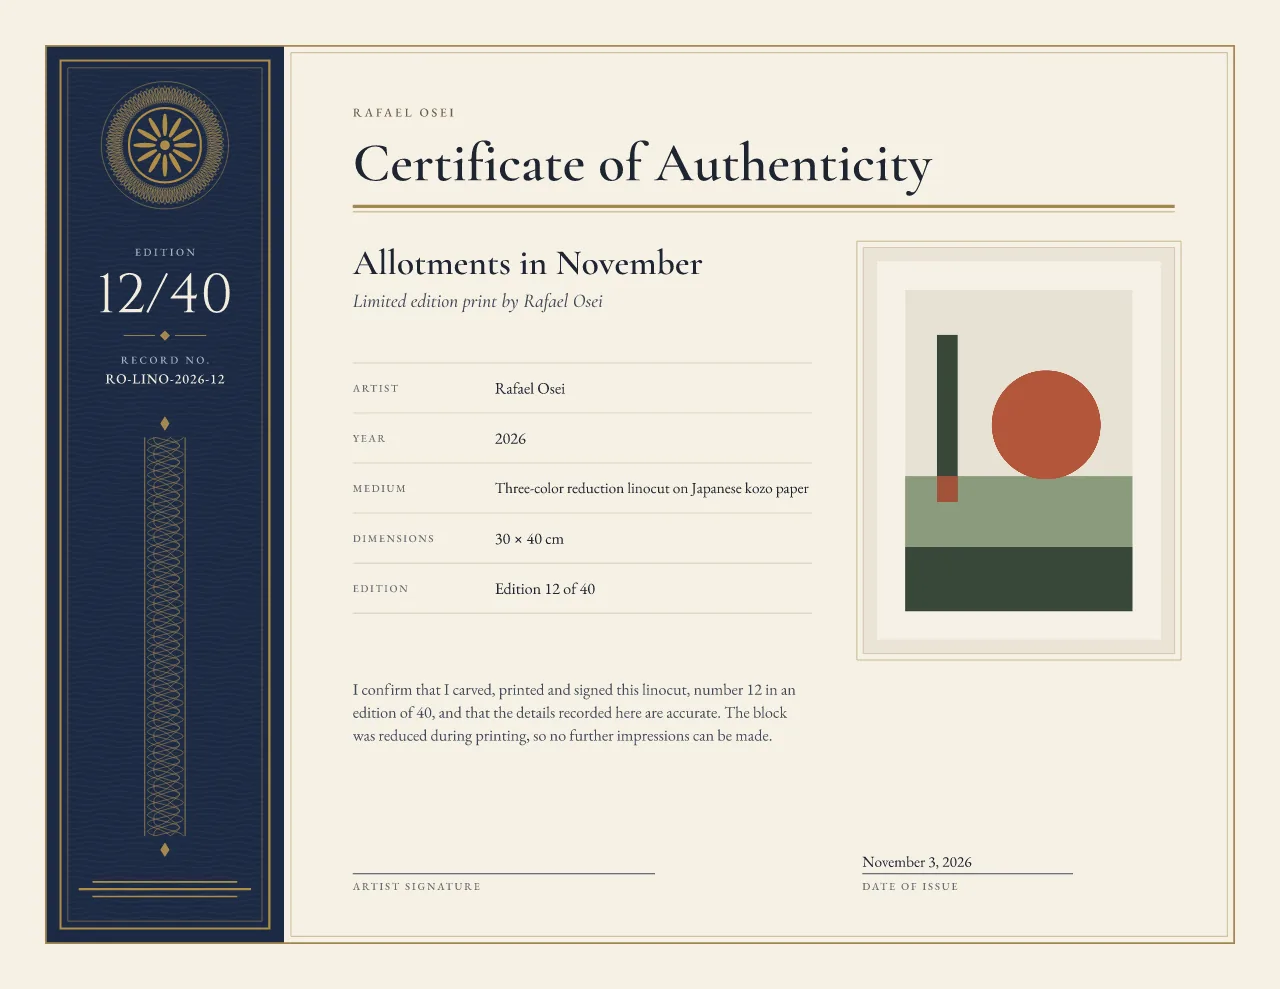
Archive Ledger design
Linocut edition, 12/40
A reduction linocut, 12/40: the statement says no more can be printed.
- Issued by
- Rafael Osei
- Work
- Allotments in November
- Medium
- Three-color reduction linocut on Japanese kozo paper
- Size
- 30 × 40 cm
- Edition
- Edition 12 of 40
- Certificate no.
- RO-LINO-2026-12
Archive Ledger, a design for numbered editions, puts the number on a dark spine where it is read first. Whichever design you choose, the number and total stay the same when you switch.
The next print in a few seconds